Adding Cards Content


1. Complete the required asterisks
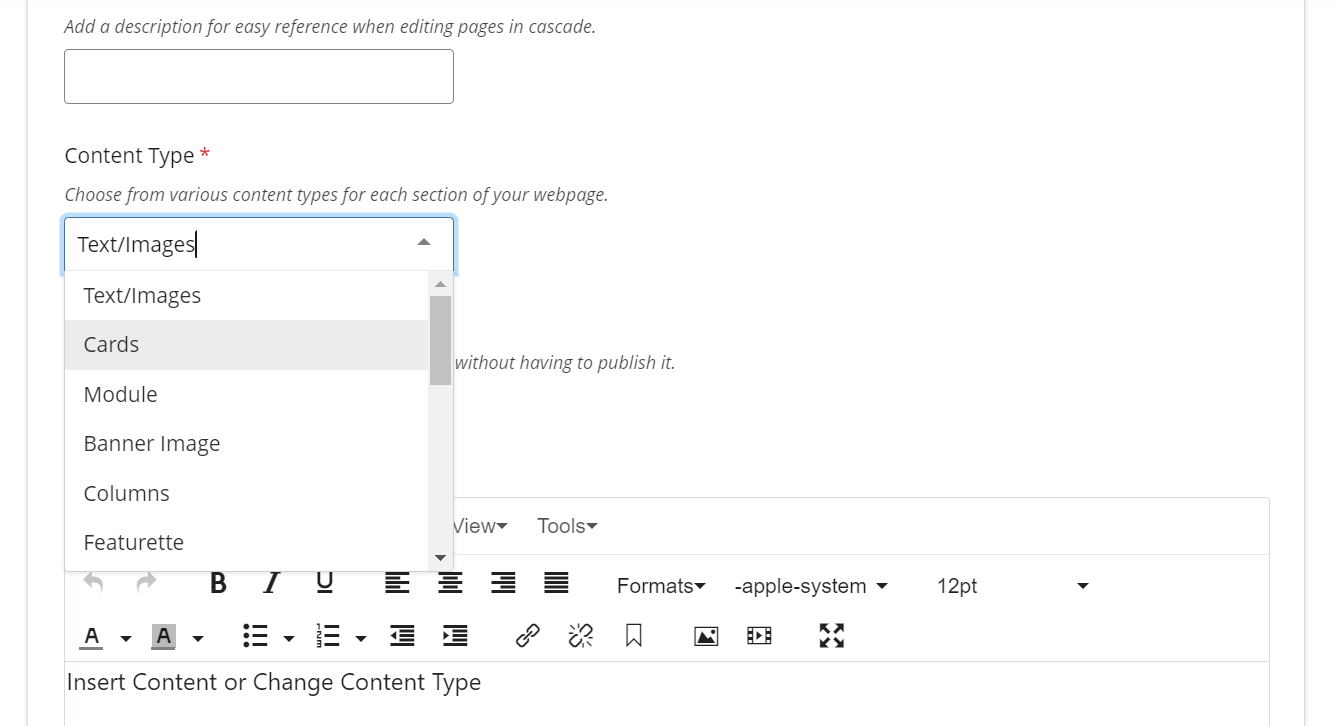
Make sure to fill in all the red asterisks, or else Cascade will prevent you from adding this content page until it is completed. Once you fill out the required information in the content page form as you learned before, now you will see the content Tab as in the following image, from the Content Type Drop down menu choose Cards.
2. Filling in the information about the cards type
All information is optional. The image below shows descriptions of each editing option to stylize and edit the card contents.

Select how many cards (maximum 4) you would like displayed for each row, customize color designs in Card Style, or adjustments to text. To add another card, select the green '+' button on the right side of "Cards" shown below.
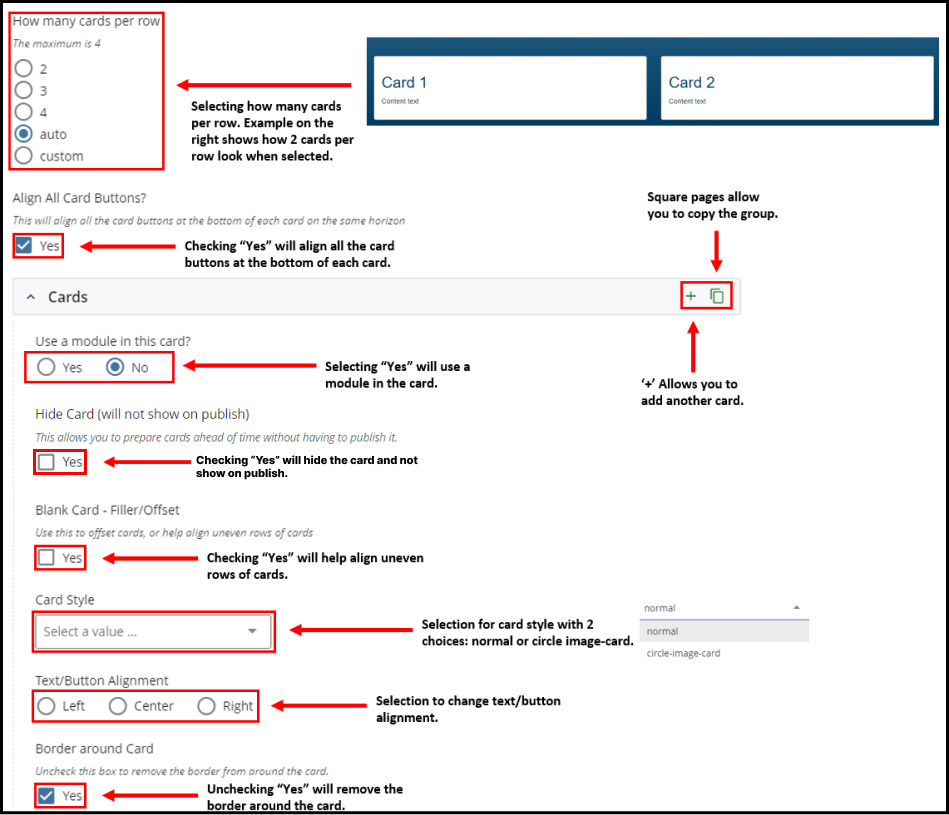
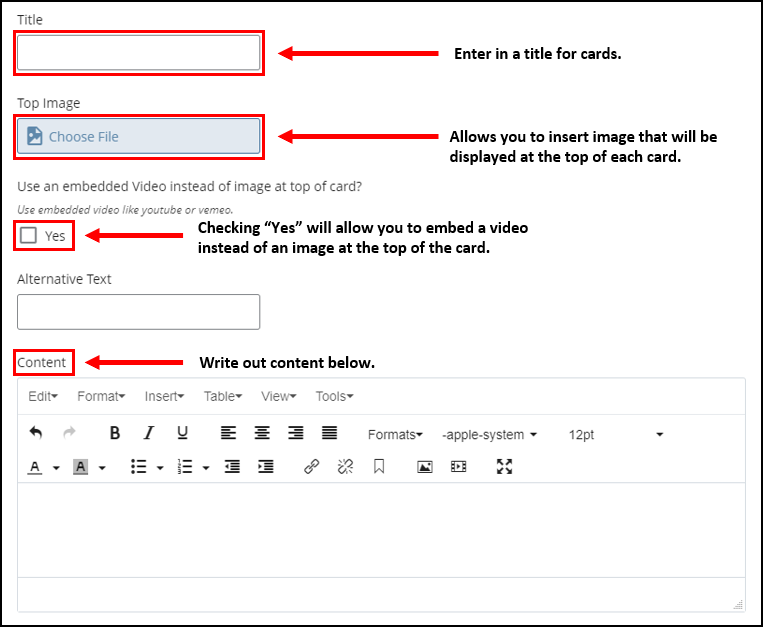
Fill in the fields that are required for your department/site. Enter in a title, image, or content you want displayed on each card. You can also use an embedded video instead of an image at the top of the card.