Table Guides
Guidelines for creating accessible tables
- Use tables for tabular data (e.g. rows and columns) - not for page layout.
- Keep tables simple. If your table is complex, consider breaking it into two or more separate tables.
- Use proper table column headings. Include <th> elements to identify column or row headings.
To create simple tables with no merged cells, see the next section below.
For complex tables with nested columns or rows, please contact IT for assistance using the Request Service link at the right.
Creating tables in Cascade
To create an accessible and responsive table in Cascade, follow the steps below.
- Copy the entire table template below (area inside the two rule lines) to your clipboard.
- Open your Cascade page for editing.
- Scroll down to the Page Content area and then move your cursor to where you want the table inserted.
- Paste the entire table into the Cascade editor.
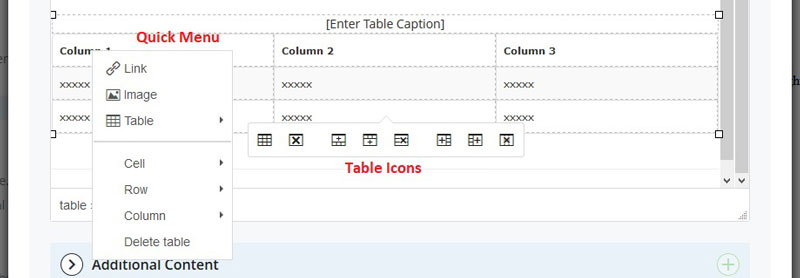
- Select the table and then edit the table column headings and row data, using the Cascade quick menu (right click) or table icons (below table).
- Include an optional caption to identify the table.
| Column 1 | Column 2 | Column 3 |
|---|---|---|
| xxxxx | xxxxx | xxxxx |
| xxxxx | xxxxx | xxxxx |
Editing tables in Cascade
To edit table column headings or row data, select the table and then use the Cascade quick menu (right click) or table icons (below table).
Necessary Accessibility Attributes
Understanding the Scope Attribute
Click the button to learn about why having the scope attribute is an importance feature to add into content pages.How to Add the Scope Attribute
Adding the scope attribute to <th> elements enhance accessibility for screen reader users. The scope attribute specifies whether the header is for the row or column it belongs to. It is important that Cascade CMS users consistently apply this attribute to tables and future content page created.