Hero Landing Page Module Tutorial (College/Division Department)
Required Modules
The module is available for use across the following template pages:
If you need assistance uploading images or videos, please refer to the Adding Content Instructions page. Visit the page and follow the provided instructions to upload your files correctly.
For this section you will need:
- College/Division Name
- One Small Image and Alternative Text
- Department Description (Optional)
- Choice of:
- A Single Image
- Carousel
- A Video
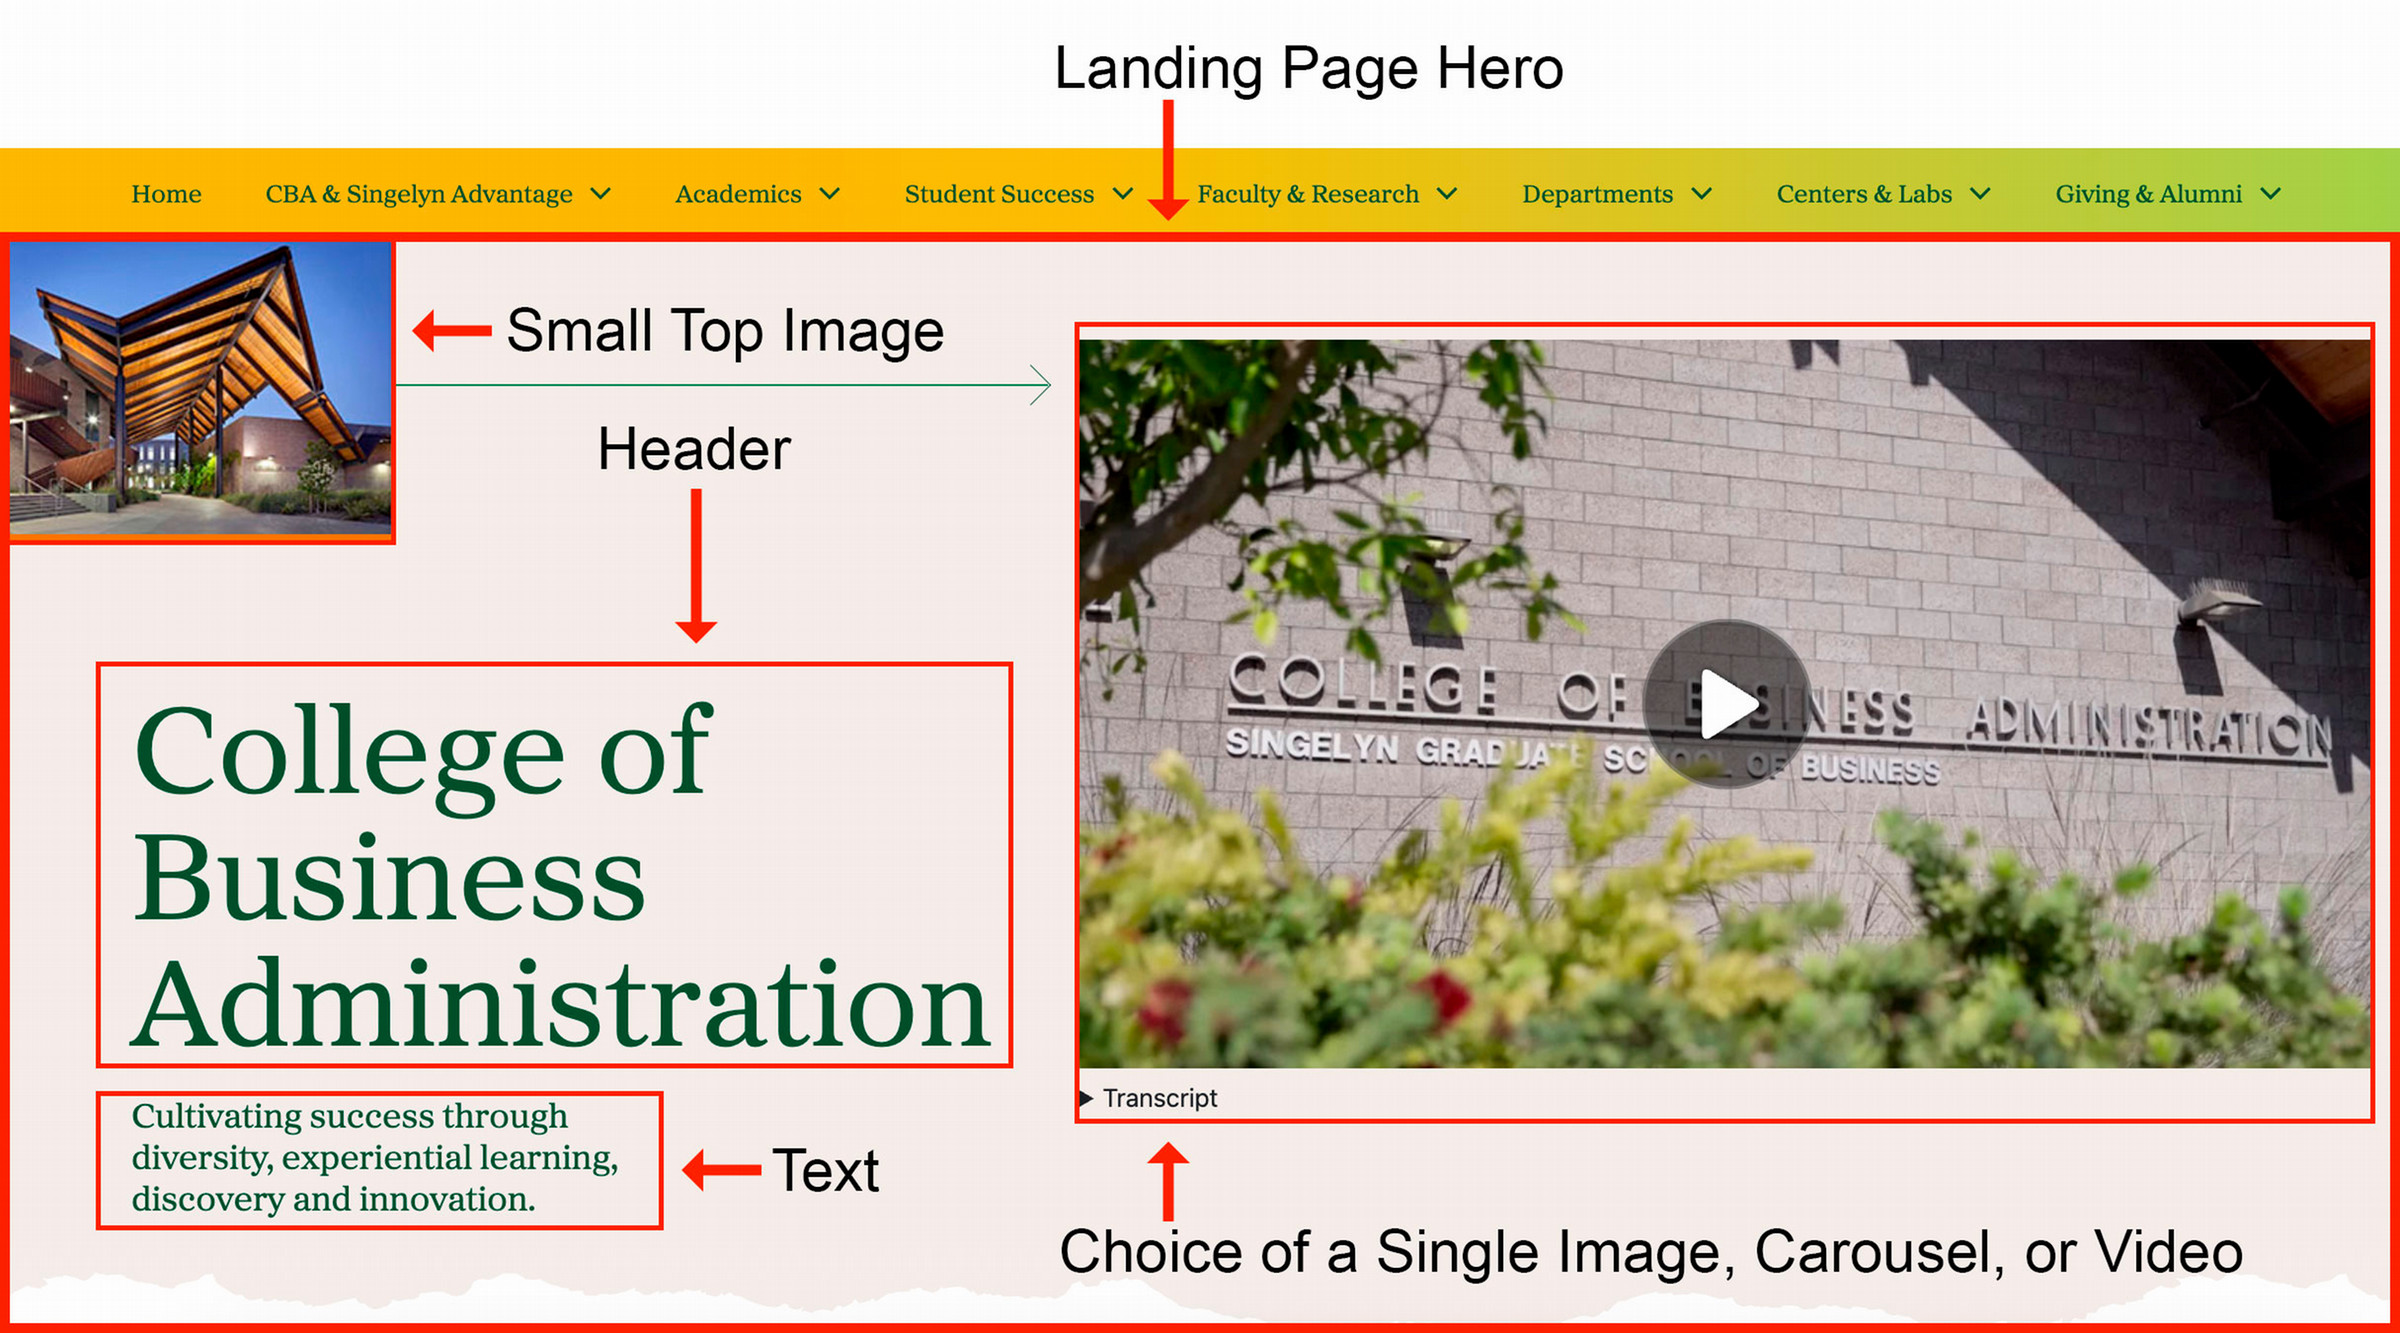
Landing Page Hero
Learn about adding a Hero to your College or Division Landing Page.
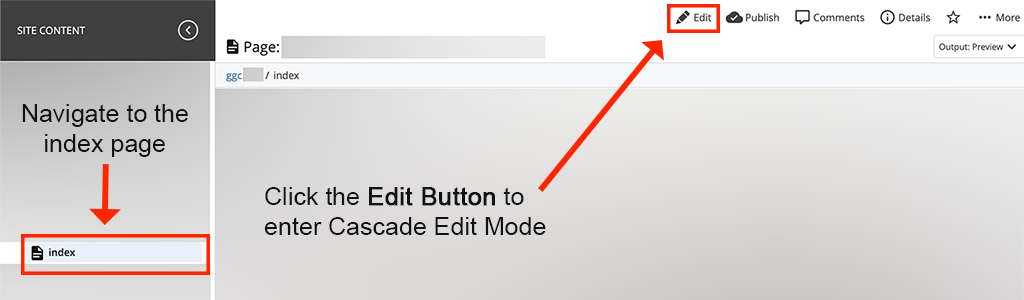
To edit a Landing Page Hero, navigate to the ggd.[your site name] or ggc.[your site name] folder in Cascade. Select the College or Division Landing Page to be edited. The image below uses the index page as an example.
Then, click Edit to enter Cascade Edit Mode.

Cascade View (Editing Mode)
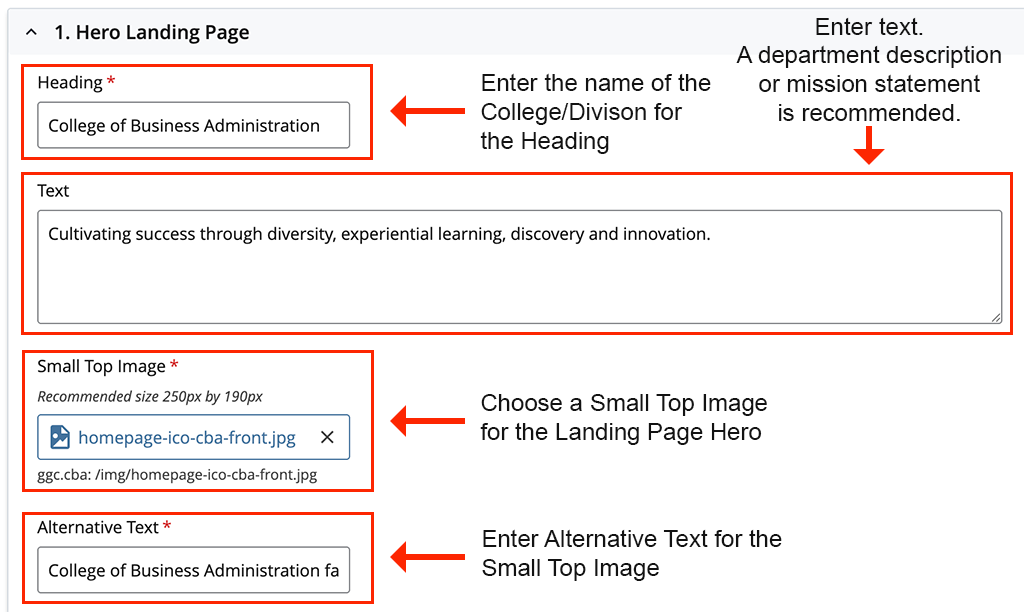
Heading: Enter the name of the College/Division Department.
Text (optional): Enter text. A department description or mission statement is recommended.
Small Top Image: Choose a small image for the top of the Landing Page Hero.
Alternative Text: Provide alternative text for the Small Top Image.
Next, select the media type to display in the Hero: Single Image, Carousel, or Video.

When choosing between Single Image, Carousel, or Video, refer to the instructions in the accordions below.
Page View

Cascade View
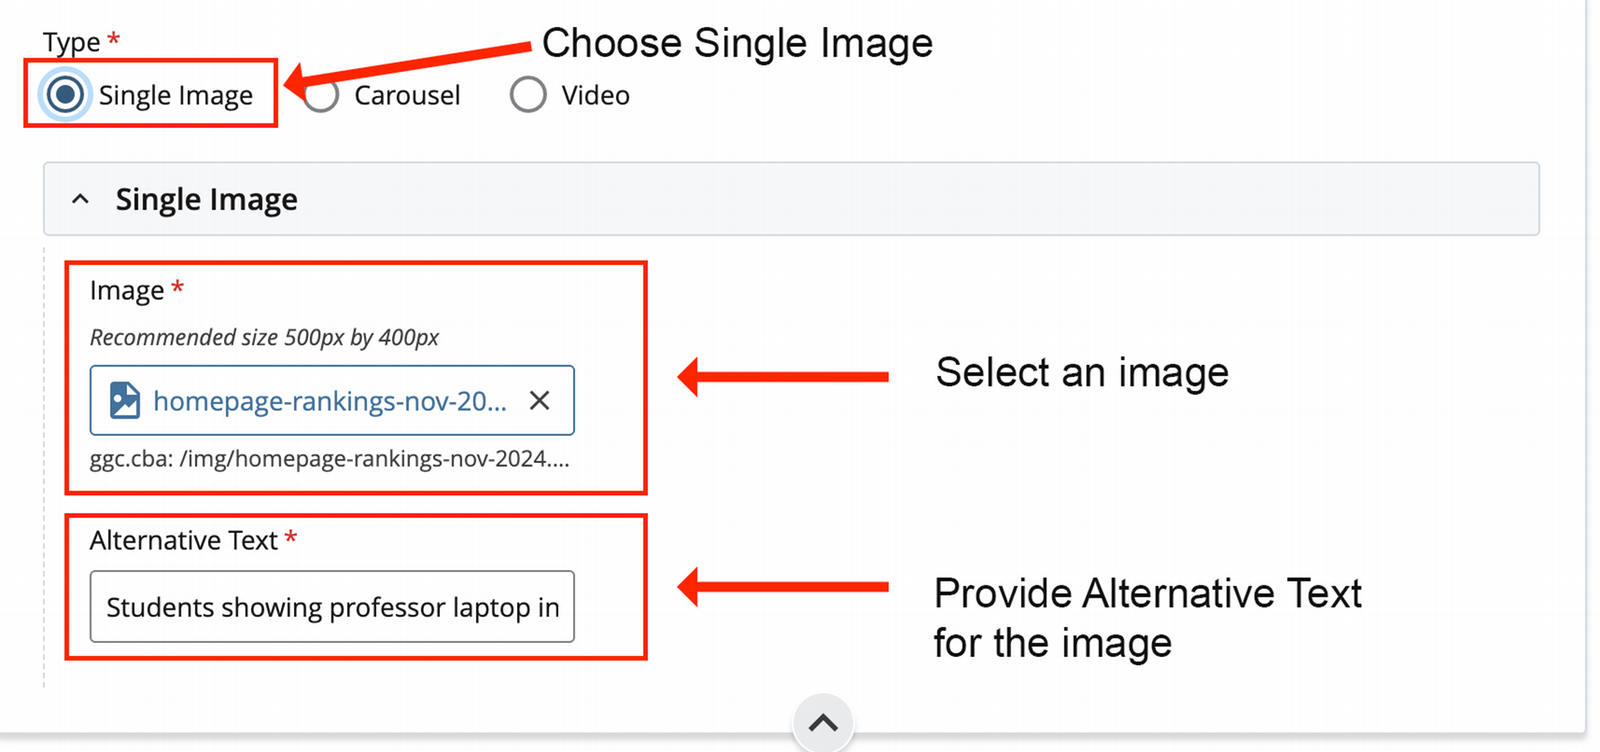
Type: Choose Single Image.
Image: Select or upload an image. The recommended size is 500px by 400px.
Alternative Text: Provide alternative text for the image.
Page View

Cascade View
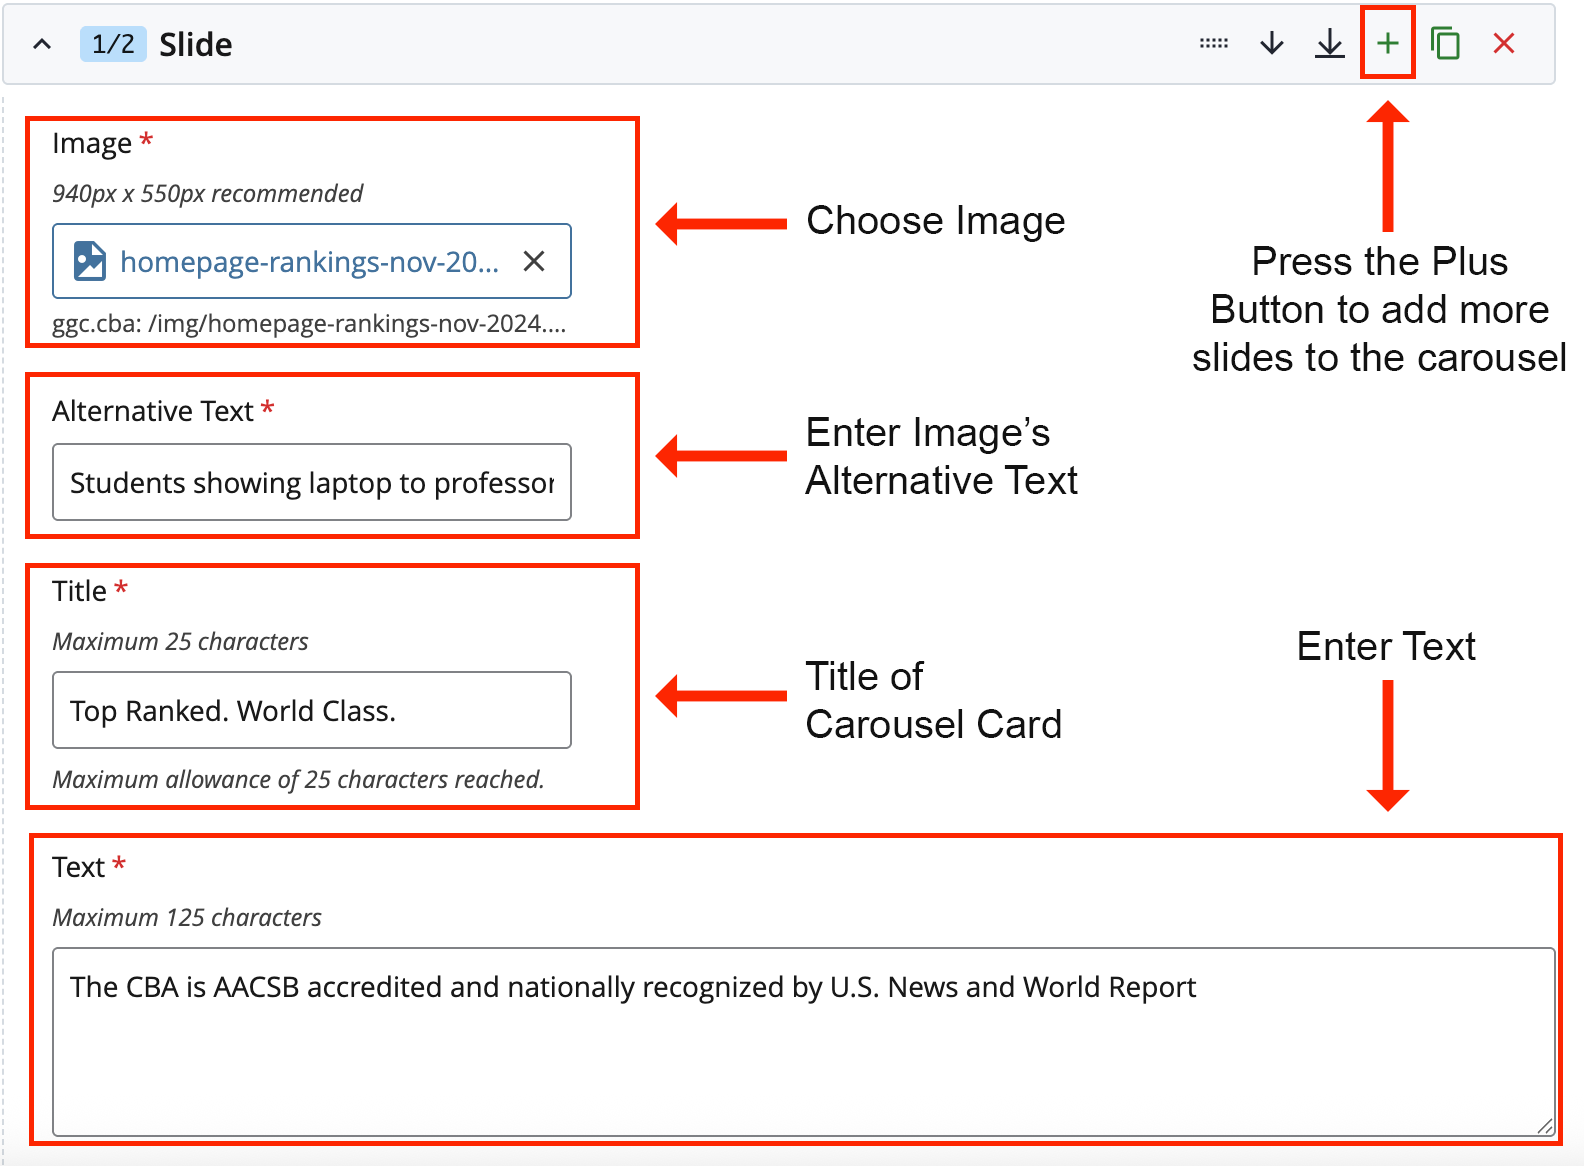
Type: Choose Carousel
Image: Select or upload an image. The recommended size is 940px by 550px.
Alternative Text: Provide alternative text for the image.
Title: Add a title to the carousel slide.
Text: Add text to the carousel slide.
Plus Button: Add more slides to the carousel.

Page View

Cascade View
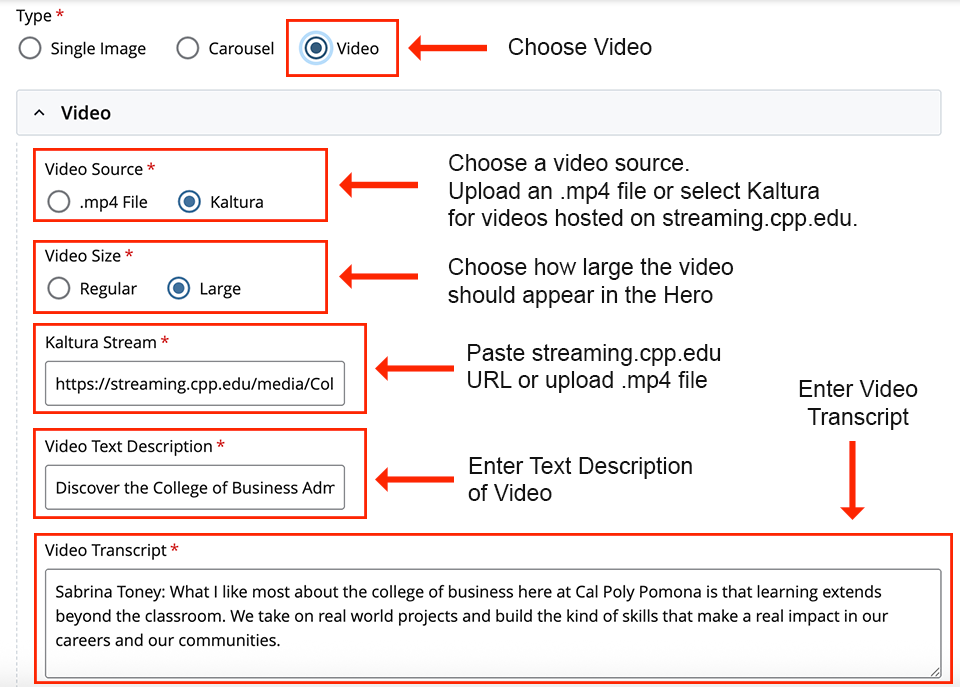
Type: Choose Video
Video Source: Choose to upload an .mp4 file or select Kaltura for videos hosted on streaming.cpp.edu.
Video Size: Choose how large the video should appear in the Hero.
Kaltura Stream/Video File (mp4): Enter the video URL or upload an mp4 file.
Video Text Description: Enter a description for the video.
Video Transcript: Enter the transcript of the video. Website users will be able to open and read this transcript.