MAC OS Screen Recording with Audio
Download and Install free app Soundflower:
- Download from Soundflower from this website
- From your downloads open the .dmg file
- Double click on the Soundflower.pkg
- Follow prompts to install
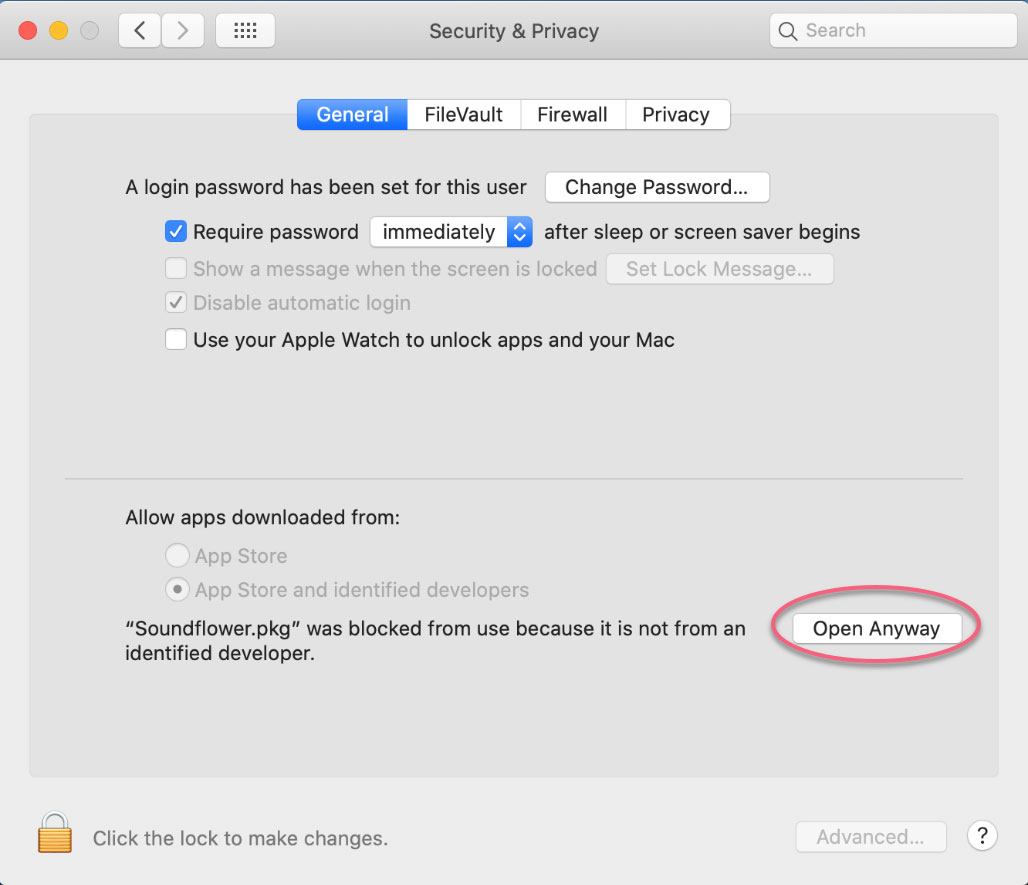
- If you receive an error while installing, you may need to adjust your security settings. Open System Preferences, click Security and Privacy. Near the bottom you might see “Soundflower.pkg was blocked...”. If so, click Open Anyway and unlock computer with system password or fingerprint.
- Return to the Soundflower installation steps to retry installation
- Once installation is complete, restart computer. Soundflower does not tell you to restart, but a restart is required for it to work.
Set-up Audio Output
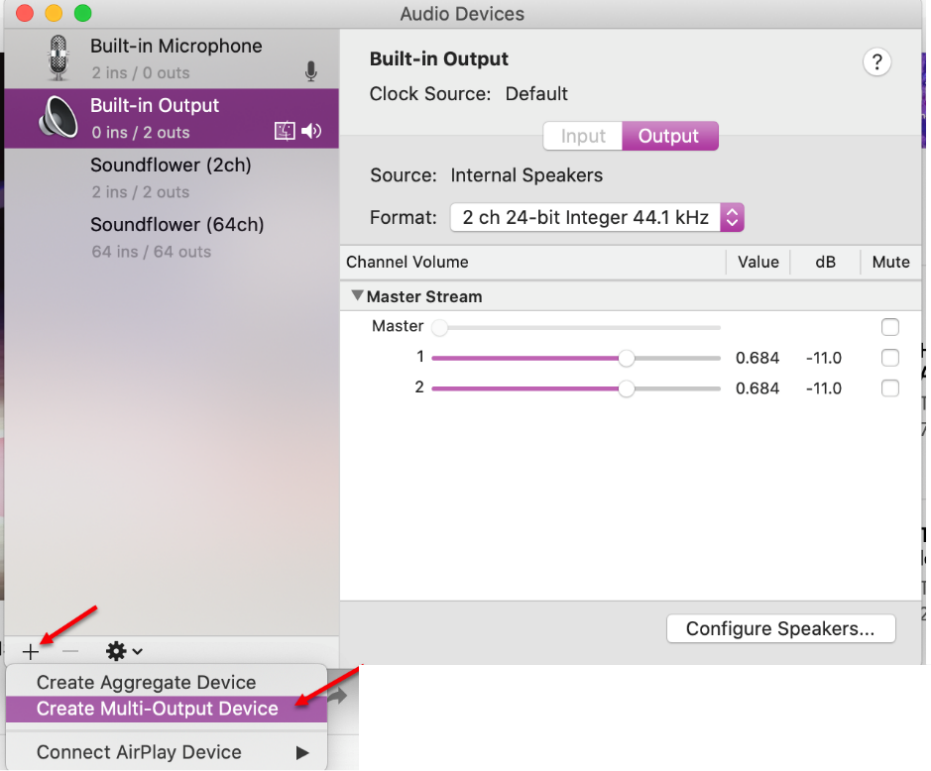
1. Launch Audio MIDI Setup (this is an app included on your MAC). The app logo is a piano keyboard2. From the bottom left, click the + button and choose Create Multi-Output Device
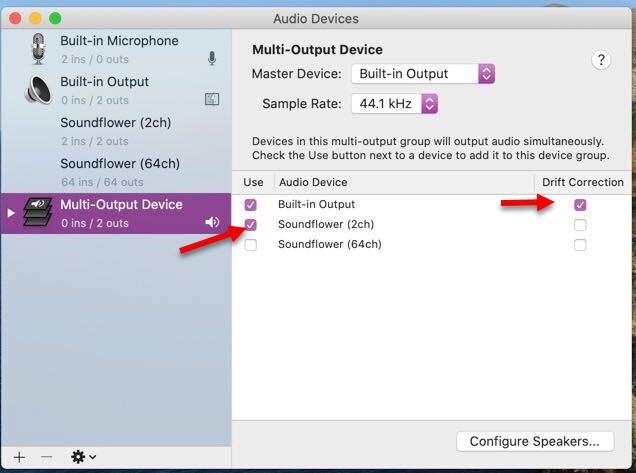
3. Update settings for Multi-output Device by clicking the box in the use column for both Built-in Output and Soundflower (2ch). Only the box for built-in output should be checked in the Drift Correction column. If you will also be using headphones (wired or bluetooth) you will need to check the box for the head phones in the Use column.
4. Click the Settings button (looks like a gear) in bottom left of the Window and click Use this for Sound Output.
Zoom Setting
1. If you are recording in Zoom, open Zoom application
2. Click on the account/profile button in top right of window, and choose Settings
3. In the Settings window, choose Audio from the left menu. Then for Speaker use the dropdown menu to select Same as System
Open QuickTime Player
1. Once you have the item you need recorded open, launch QuickTime Player (also an app on your computer)
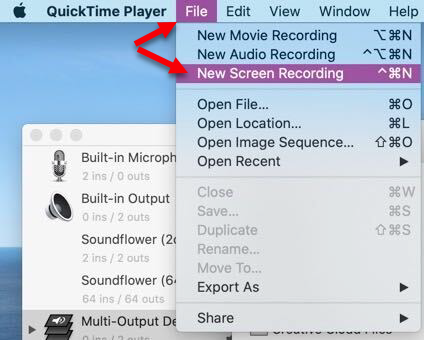
2. When ready to record, click on File at the top, and select New Screen Recording
3. This will open an opaque window with a menu at the bottom with choices on what part of the screen to record. Select the portion of the screen that your class video will be or choose to record entire screen. In the options tab you can select where you want to save the file. All other options can be left alone.
4. When ready to start recording click the record button in the menu
5. When ready to stop recording, in the menu bar at the top of the Mac a stop button (black circle with square in center) will appear
![]()
6. Once the recording has stopped, you video will open
These instructions are intended for students eligible for recorded lectures and/or notetaking accommodations through the Disability Resource Center. Students must have requested the accommodation for the course through DRC Online Services before recording any lecture. Recordings are for personal educational use only and must not be shared, published or quoted. Recordings must be deleted at the end of the term. Violation of these conditions will be reported to Student Conduct and Integrity