Figure and Image Captions Tutorial
Instructions
This tutorial will show you how to add captions to your images, as well as format them on the page within a field of text.
The Page View section will show what the figures and image captions look like on a page.
The Cascade View section will give a short tutorial on applying image captions and formats.
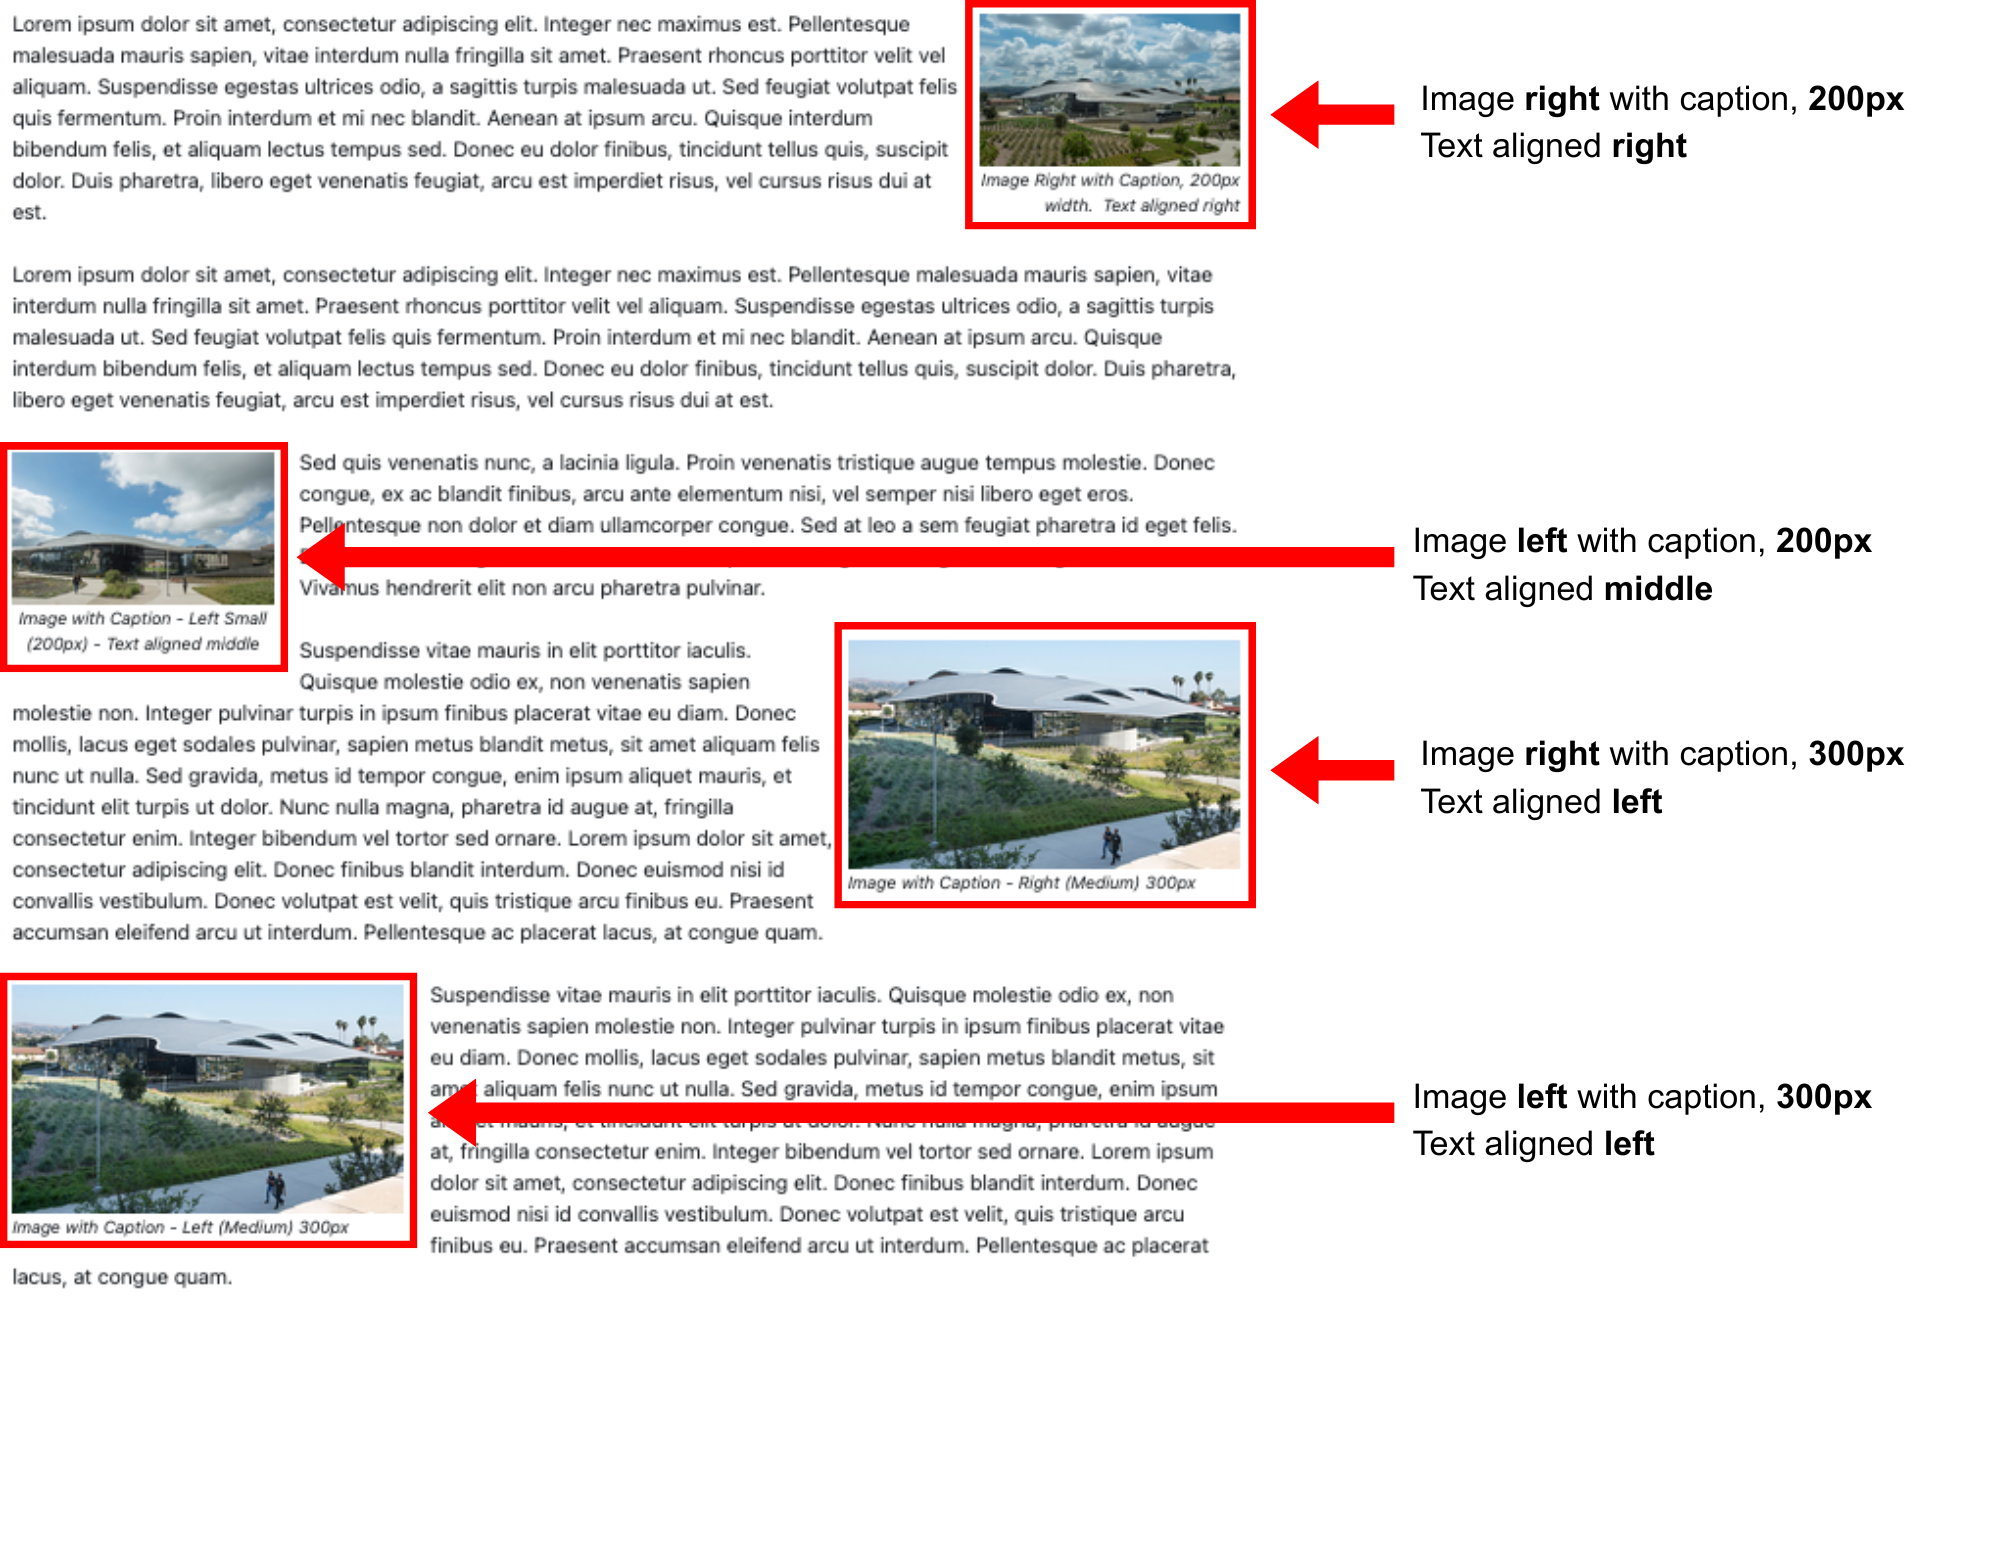
Page View
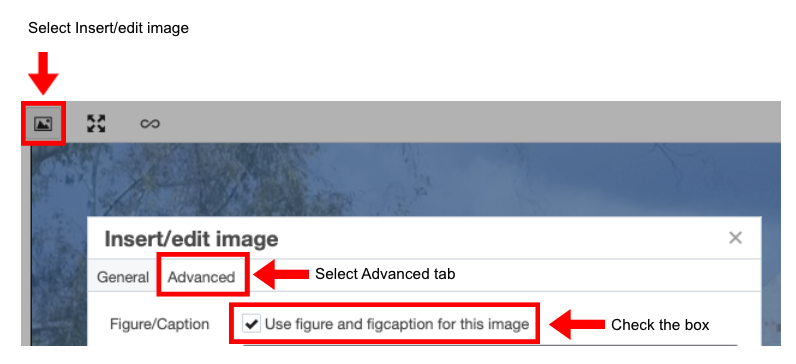
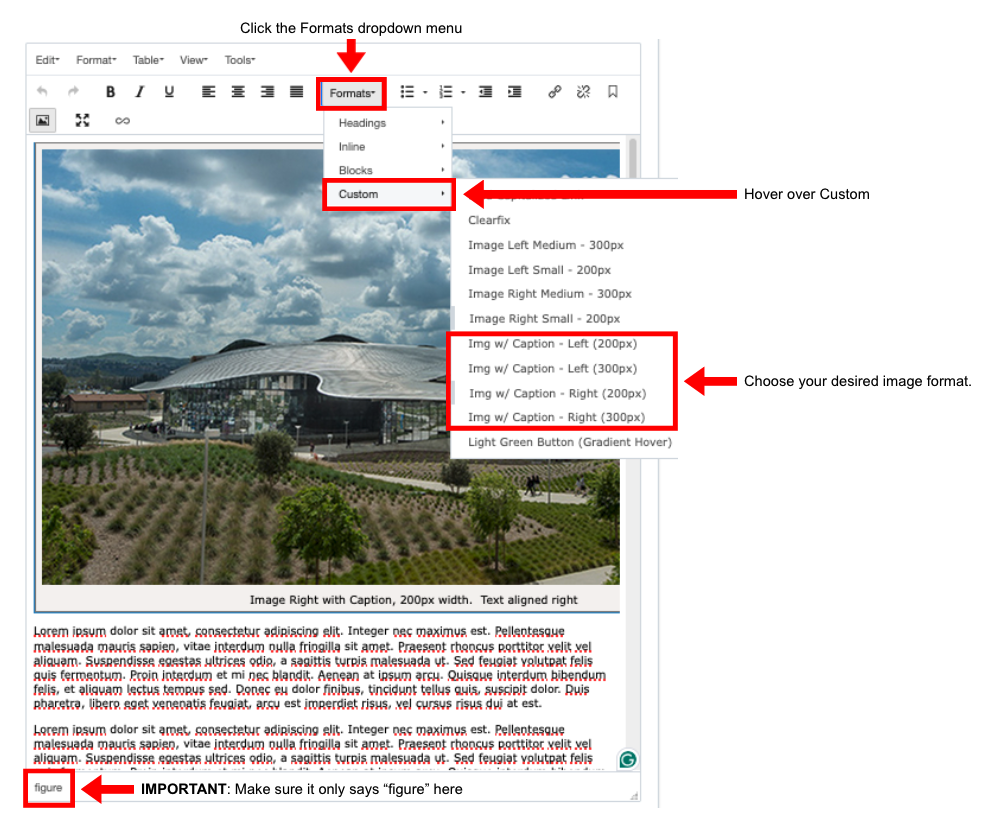
Cascade View
1. In a Text/Image context option, add your text and images as normal. Then add a caption to your image by navigating to the Advanced tab of the image settings. See Figure 1.
A caption text should appear under your image. You can edit it like a normal text, and use left/center/right/justify alignment.
NOTE: Make sure your caption has spaces. If you have a long, continuous string (like a URL), the text will overflow into the surrounding space/text.
2. To choose your format of the image, select the figure portion of the image. Make sure it only says "figure" at the bottom. Then go through the Formats menu and select any of the four formats. See Figure 2.
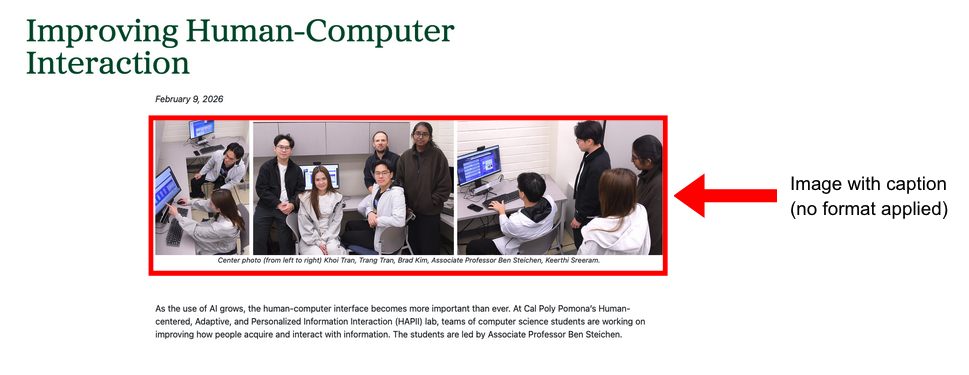
If you want an image/figure centered on the page, like the first image shown under Page View, do not apply any formats.
After selecting a format, it will be applied to the image.
NOTE: If you want to change the format, you need to deselect the previous format after selecting the new format. (e.g. Select new format, THEN deselect old format). This is because it is possible to apply multiple formats, but the image will only prioritize one of the formats to use.