Tables Tutorial
Guidelines For Creating Accessible Tables
- Use tables for tabular data (e.g. rows and columns) - not for page layout.
- Keep tables simple. If your table is complex, consider breaking it into two or more separate tables.
- Use proper table column headings. Include <th> elements to identify column or row headings.
To create simple tables with no merged cells, see the next section below.
For complex tables with nested columns or rows, please contact IT for assistance using the Request Service link at the right.
Creating Tables In Cascade
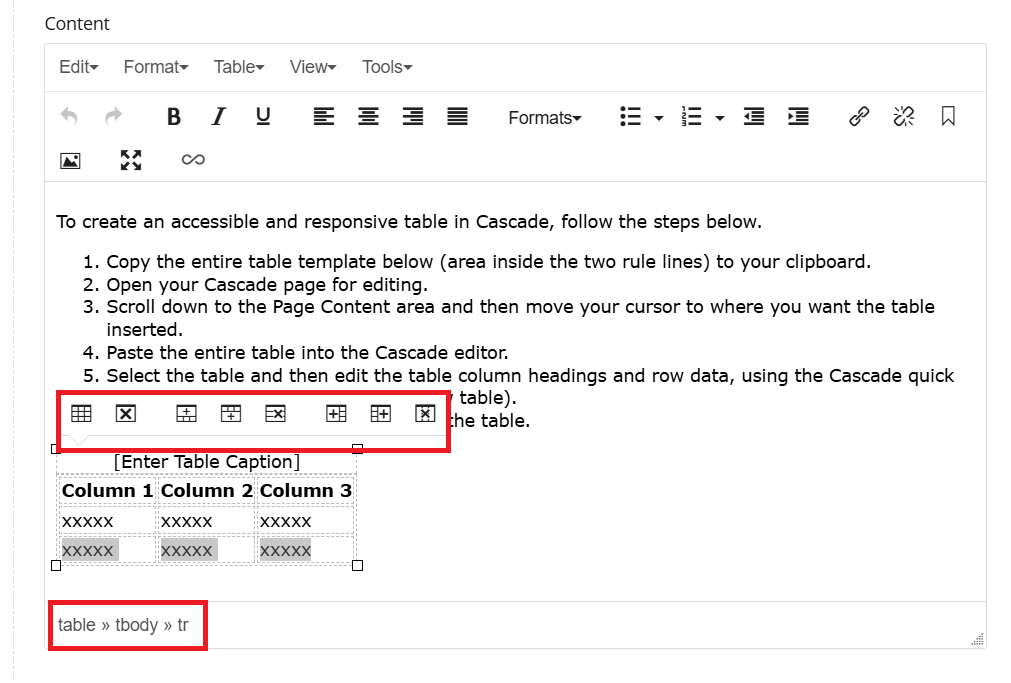
To create an accessible and responsive table in Cascade, follow the steps below.
- Copy the entire table template below (area inside the two rule lines) to your clipboard.
- Open your Cascade page for editing.
- Scroll down to the Page Content area and then move your cursor to where you want the table inserted.
- Paste the entire table into the Cascade editor.
- Select the table and then edit the table column headings and row data, using the Cascade quick menu (right click) or table icons (below table).
- Include an optional caption to identify the table.
| Column 1 | Column 2 | Column 3 |
|---|---|---|
| xxxxx | xxxxx | xxxxx |
| xxxxx | xxxxx | xxxxx |
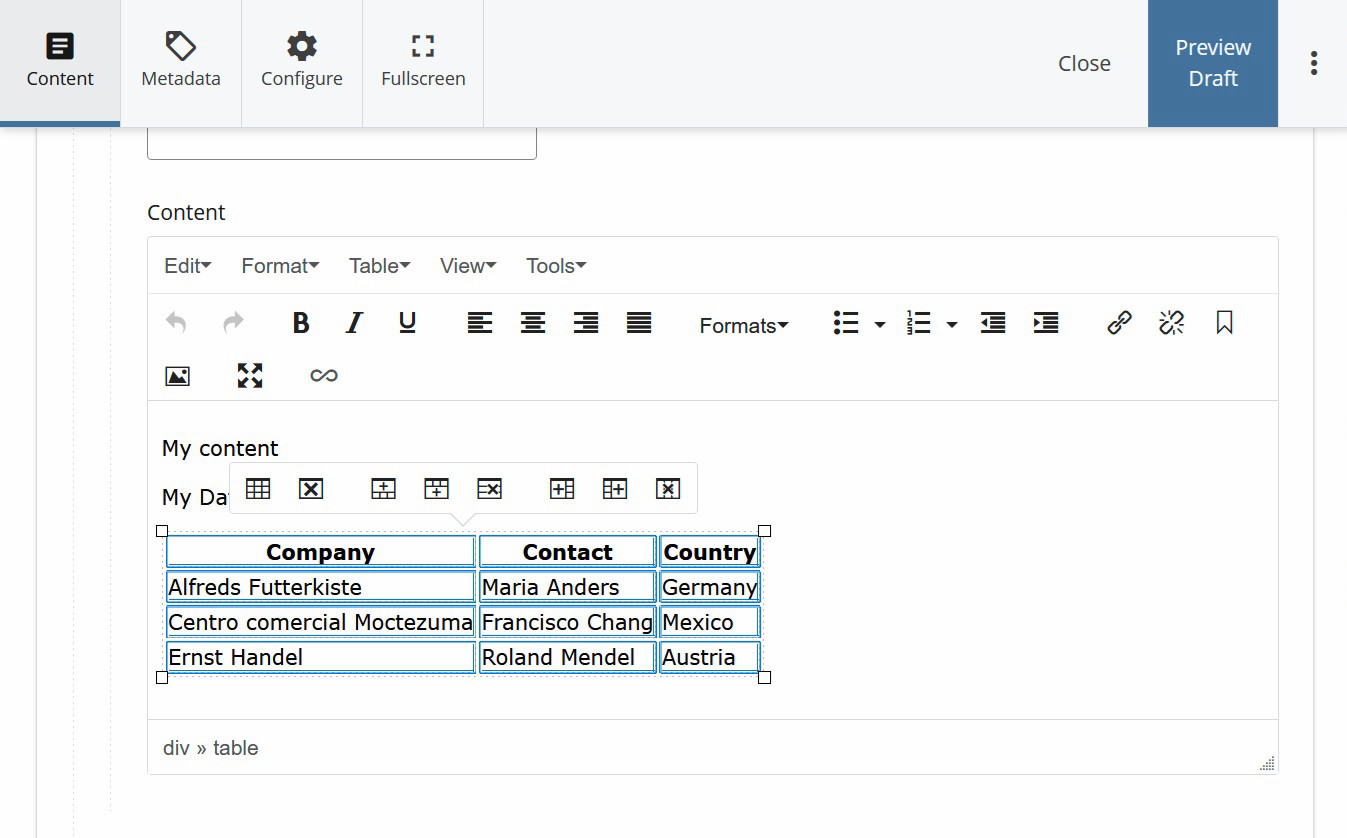
Editing Tables In Cascade
To edit table column headings or row data, select the table and then use the Cascade quick menu (right click) or table icons (below table).
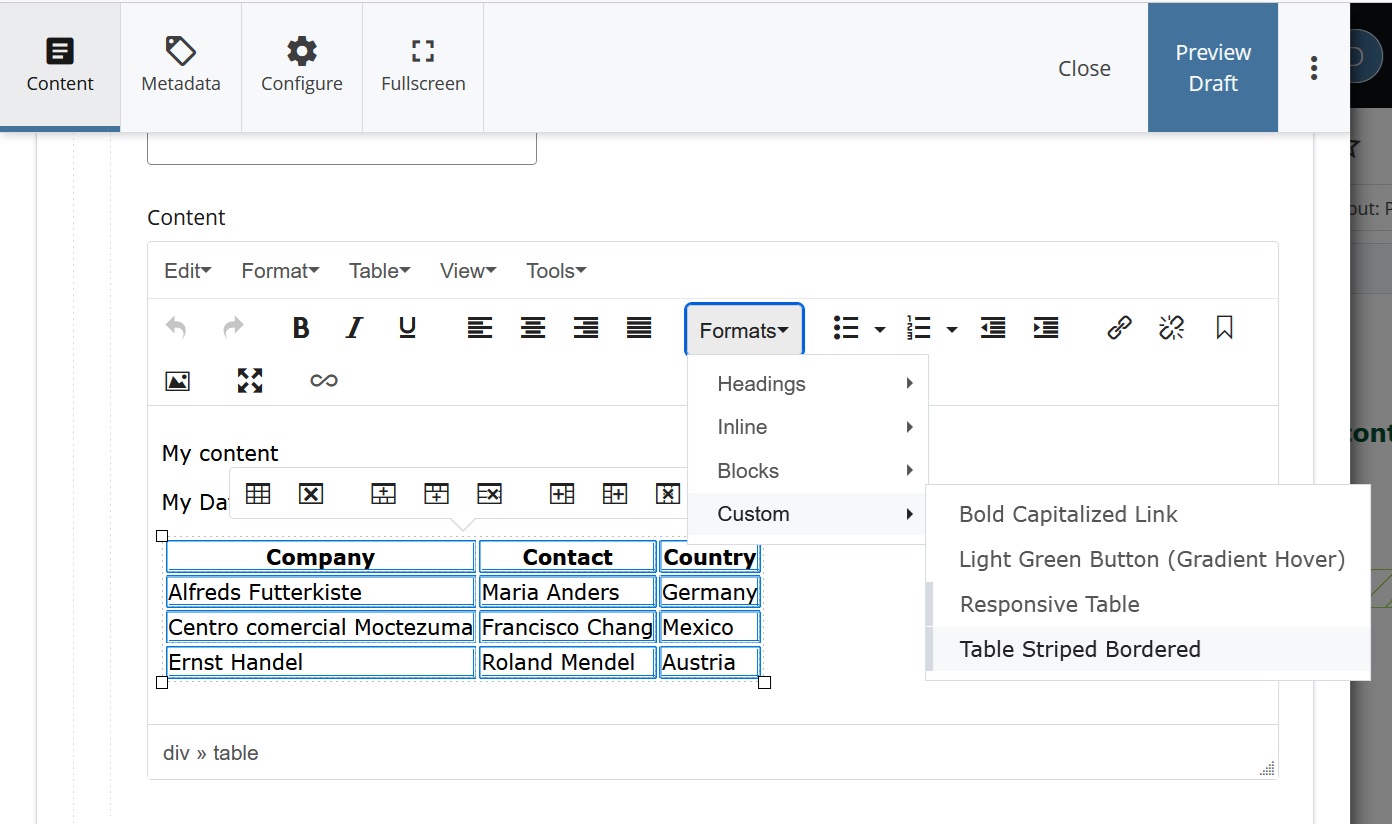
Applying Custom Style to Your Table
- Move cursor inside table

- Select 'table' link below table to select the entire table
- In Editor menu, click Formats > Custom > Table Striped Bordered
Understanding The Scope Attribute
Expand the accordion to learn about why having the scope attribute is an importance feature to add into content pages.
Understanding <thead>, <tfoot>, and <tbody> Elements
As your tables become more complex, it's helpful to provide them with structural definition. One way to achieve this is by utilizing <thead>, <tfoot>, and <tbody> elements.
-
<thead>: This marks up the header section of the table, providing a clear delineation of the table's top row(s). It's useful for styling and layout purposes, such as repeating the header on every printed page or applying specific CSS styles. -
<tfoot>: Similar to<thead>,<tfoot>marks up the footer section of the table. It's beneficial for organizing and styling the bottom row(s) of the table, offering opportunities for CSS customization and layout adjustments. -
<tbody>: The<tbody>element defines the body section of the table, encompassing the main content rows. While it doesn't directly impact visual appearance or accessibility, it serves as a structural marker for styling and layout purposes. For instance, you can control the display of the table body, allowing contents to be scrollable within a fixed area.
Although these elements may not directly enhance accessibility for screen reader users or provide visual enhancements on their own, they serve as essential structural components that aid in organizing, styling, and manipulating tables within your content. By leveraging <thead>, <tfoot>, and <tbody>, you can effectively manage the layout and presentation of tables, ensuring optimal readability and user experience.
Enhancing Tables with Bootstrap
Bootstrap, when integrated with Cascade CMS, offers a seamless way to improve table structure and style. With Bootstrap:
-
Responsive Design: Tables adapt smoothly to different screen sizes for enhanced accessibility.
-
Table Classes: Apply classes like
table-striped,table-bordered, andtable-hoverto style tables effectively. -
Utility Classes: Customize table layouts and alignments with Bootstrap's utility classes.
By incorporating Bootstrap into your Cascade CMS workflow, you can easily create professional-looking, responsive tables with minimal effort.
Citations were used from thefollowing links. Click below to learn more in-depth explanations and examples:
1. HTML Tabel Advance Features and Accessibility - MDN Web Docs
2. Creating Accessible Tables - WebAIM
3. Tables with Bootstrap - GetBootstrap
How to Add the Scope Attribute
Adding the scope attribute to <th> elements enhance accessibility for screen reader users. The scope attribute specifies whether the header is for the row or column it belongs to. It is important that Cascade CMS users consistently apply this attribute to tables and future content page created.
Adding the scope attribute to <th> elements enhance accessibility for screen reader users. The scope attribute specifies whether the header is for the row or column it belongs to. It is important that Cascade CMS users consistently apply this attribute to tables and future content page created.
For example, <th scope="col"> defines the column header.
| Column 1 | Column 2 | Column 3 |
|---|---|---|
| Text 1 | Text 2 | Text 3 |
Applying the Scope Attribute Guide:
Step 1: Create your table within Cascade CMS for your content page. Be sure to select the necessary number of columns or rows that are the header for the table.
Step 2: Once your table is created, highlight all the table headers, whether they represent row or column headers.
Step 3: Right-click on the highlighted table header and then select "Cell" and go into "Cell Properties" from the menu displayed.
Step 4: In the "Cell Properties" page, select the Cell Type to "Header cell" and choose the appropraite Scope options based on your table's structure and formatting.
Step 5: Save your changes and preview the content page. Right-click on the table and select 'Inspect'. Confirm the table is marked with either <th scope="col">, <th scope="row">, <th scope="colgroup">, or <th scope="rowgroup">, indicating the scope has successfully been added into the table.
By following these steps, you can efficiently add the accessibility scope attribute to your tables in Cascade CMS.